Showing posts with label Stairs. Show all posts

8.15.2012

Stair Recap

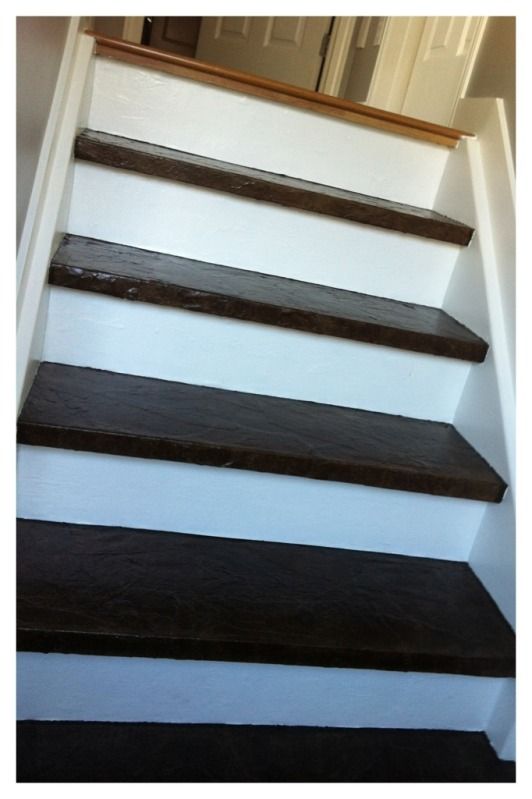
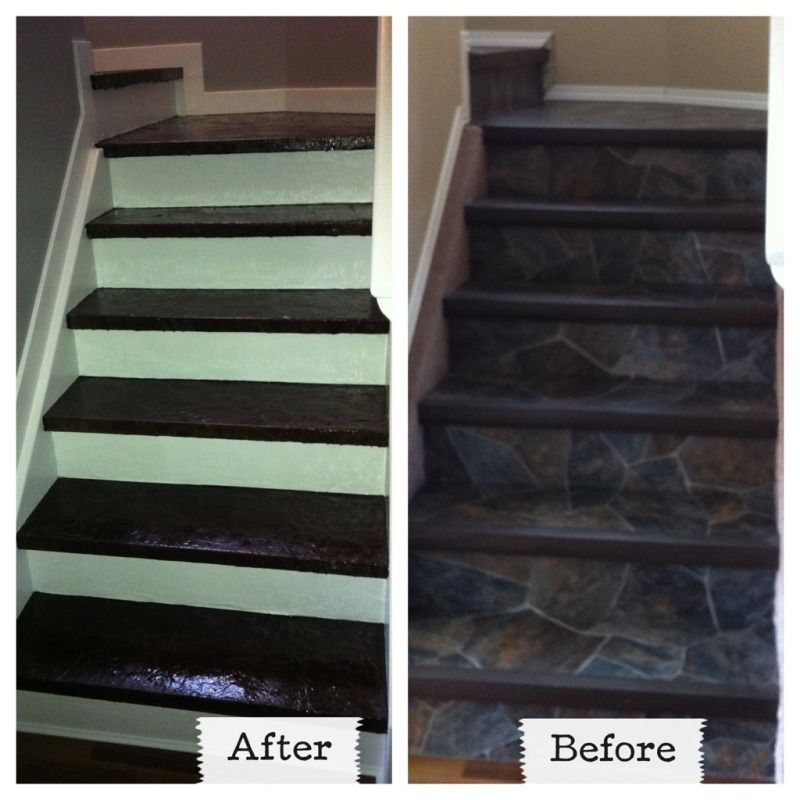
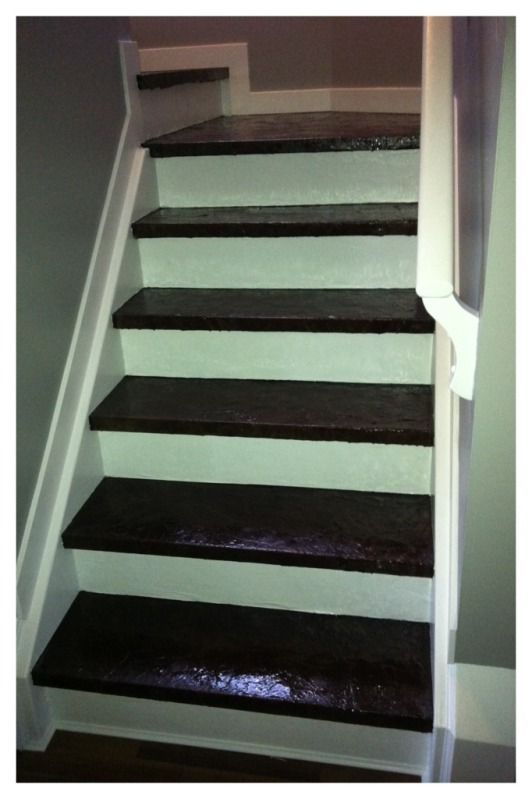
So it's been brought to my attention that the pictures I posted in the Stair Reveal look green. My stairs aren't green! Promise!! So I took more pictures in broad daylight.  But I figure if I'm going to post more photos, I might as well give you one easily referenceable (it's a word!) post about how I took this:

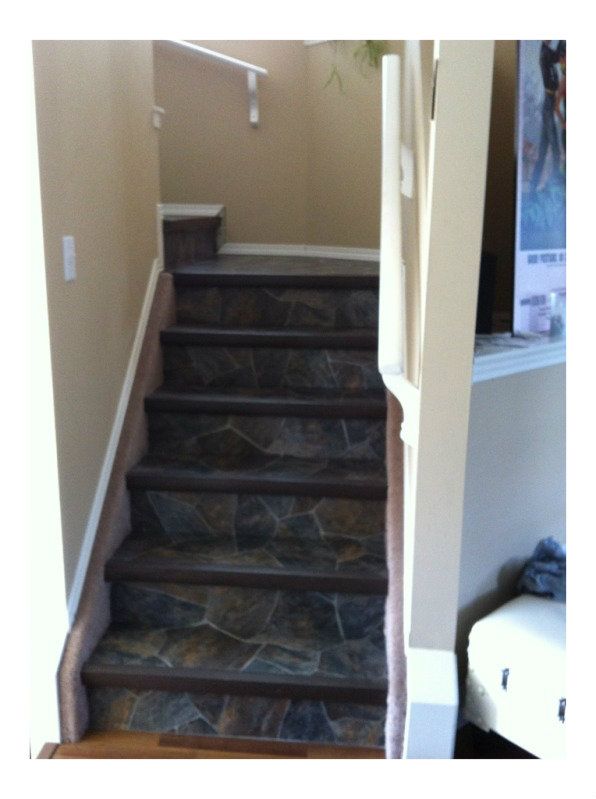
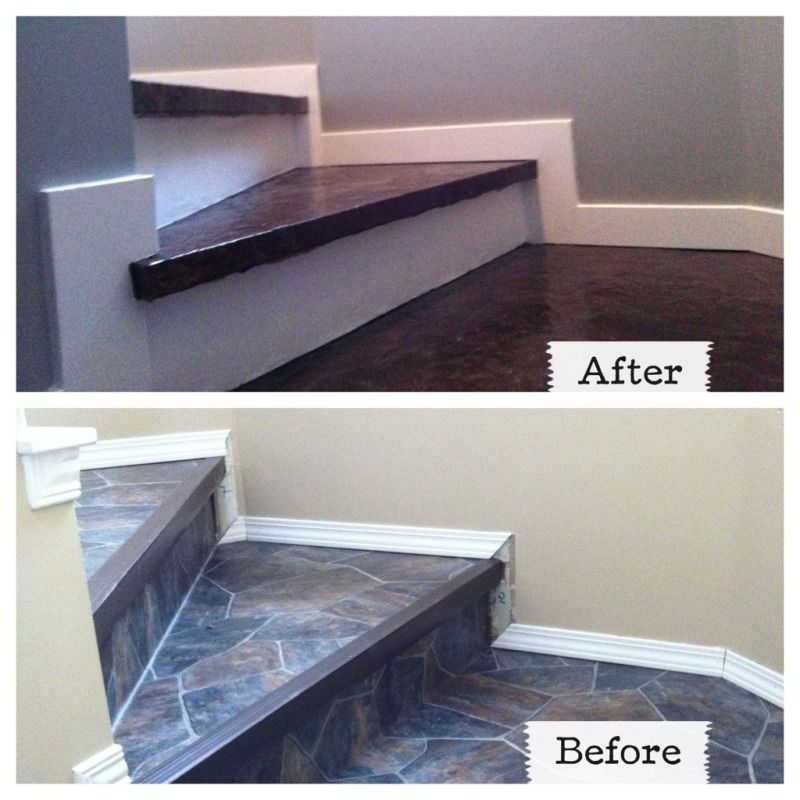
And turned it into this:

For 200$ ish. Minus the baseboards- but I'd say that probably only added about 20$ to the total materials bill.

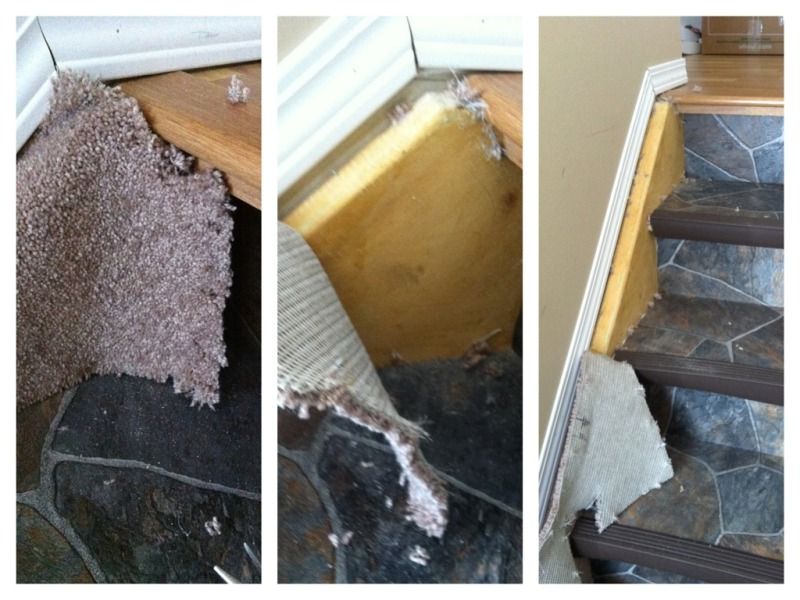
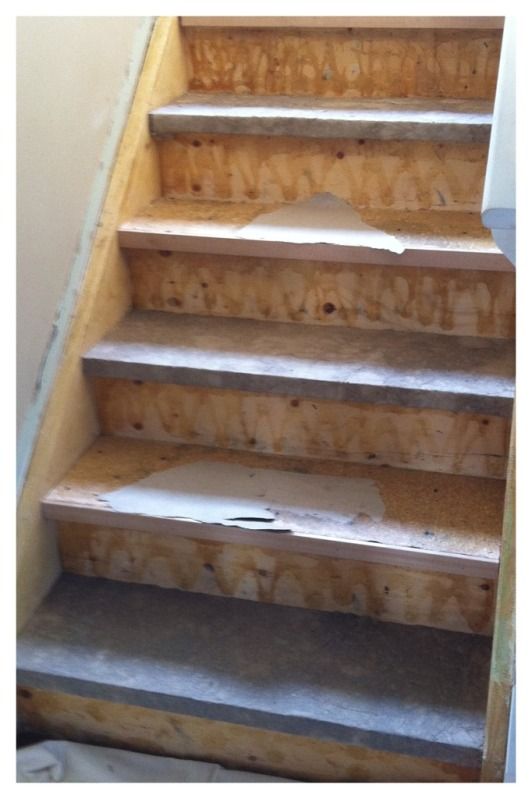
So- first things first. As you can see in those horrific "before" photos, the stairs were covered in lino on the risers and treads, and the stringers were covered in carpet. Gross. So the first order of business was to tear off the carpet, and then the lino.

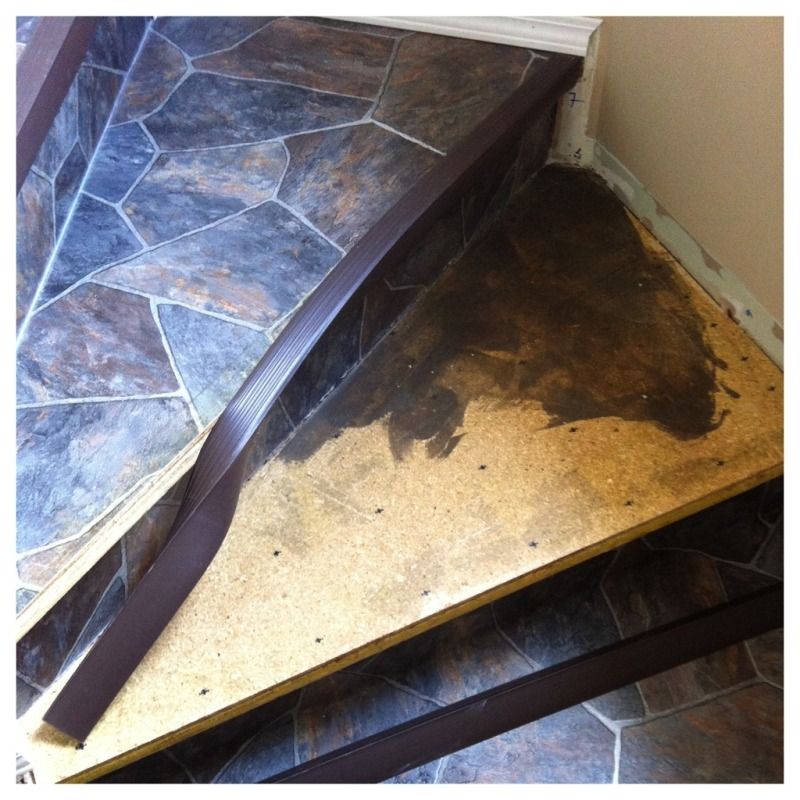
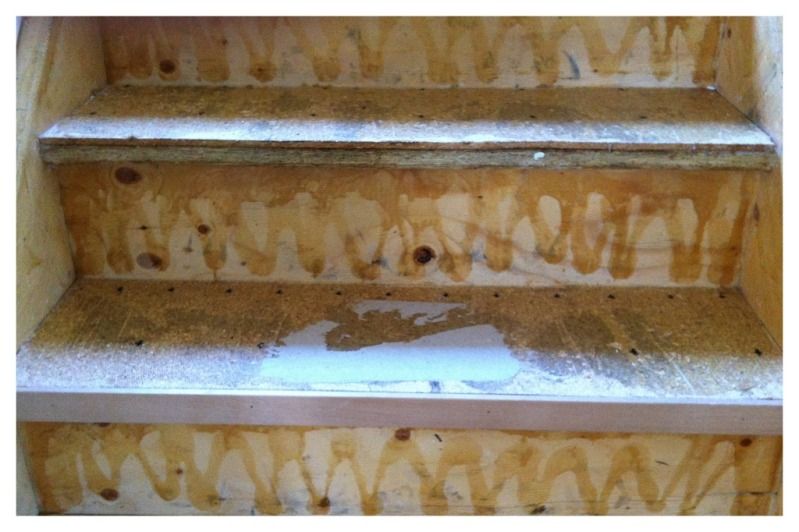
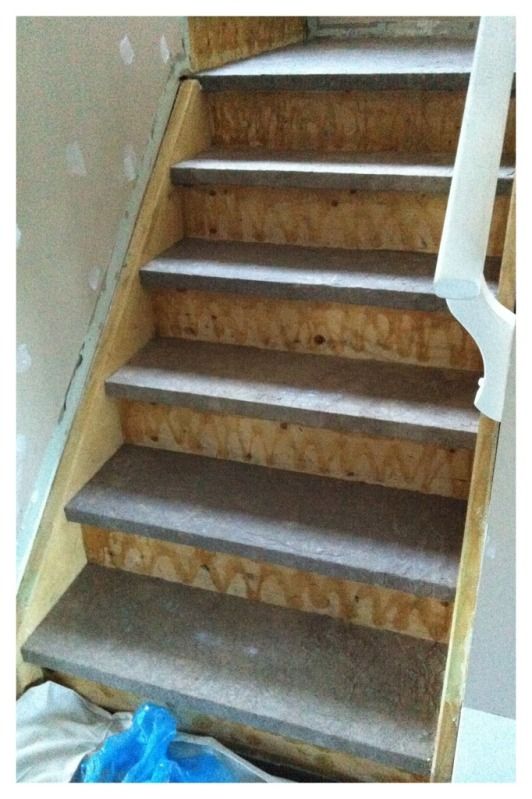
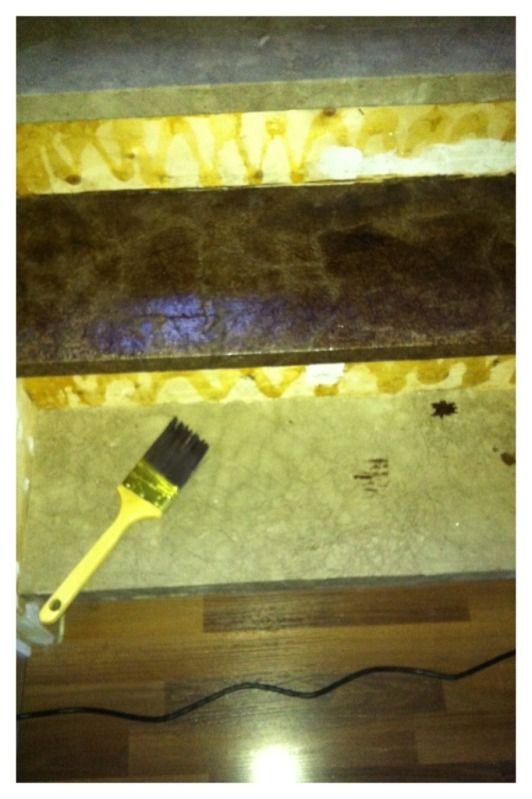
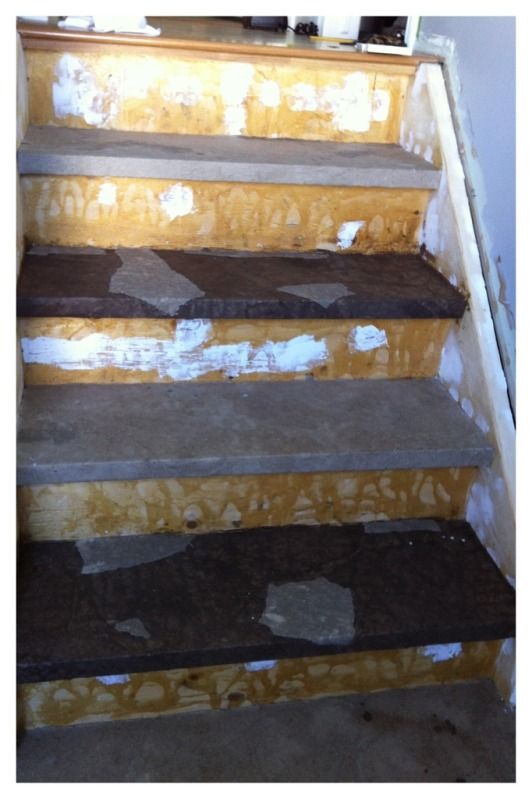
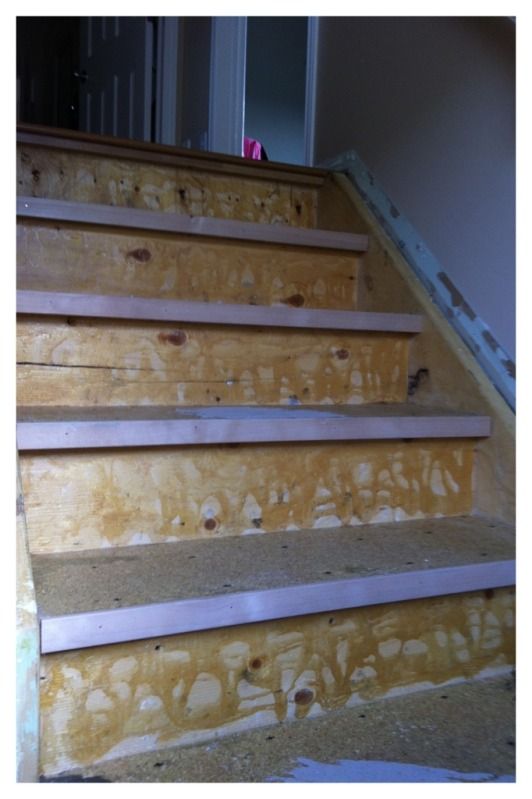
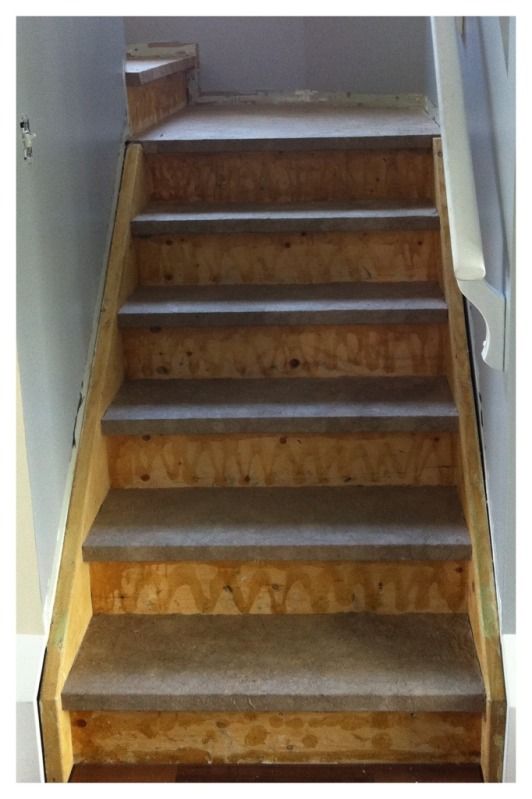
As you can see, both came up relatively easily- thank heavens. The most painful part of the tear down was pulling all the staples from the carpet out of the stringers. We also ripped up all the "baseboards". Which left us with this beauty:

There is a bit of lino left there because there was some tacky residue left behind on the stairs and it was like walking on human flypaper- and that made getting up the stairs rather unpleasant. Next step was fixing the nosings edges, as our stairs were builder-grade and meant to be carpeted. Which means they were built out of several layers of press board and had no smooth edges. So we went to Home Depot and gathered our supplies. We ended up returning with this:

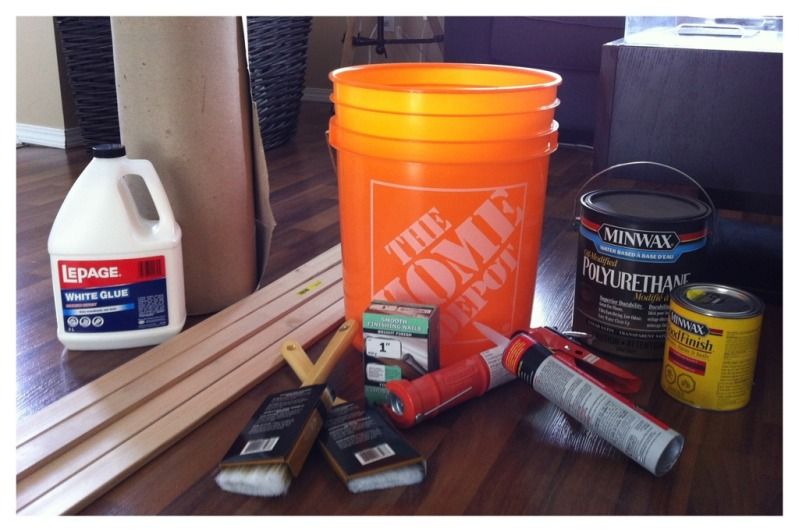
A gallon bucket, a roll of dry sheathing, a 3L jug of white glue, hemlock trim, two dollar store paintbrushes, a caulking gun, PL400 construction ashiesive, paintable caulk (not pictured), brown caulk (not pictured), 1" smooth finishing nails, a roll of paintable wall liner (not pictured), a can of MinWax wood stain in Special Walnut, and a can of MinWax Oil-Modified Waterbased Polyurethane in Satin.  That's it- that's ALL we used on the stairs except for paint. And baseboard, but that was another project.

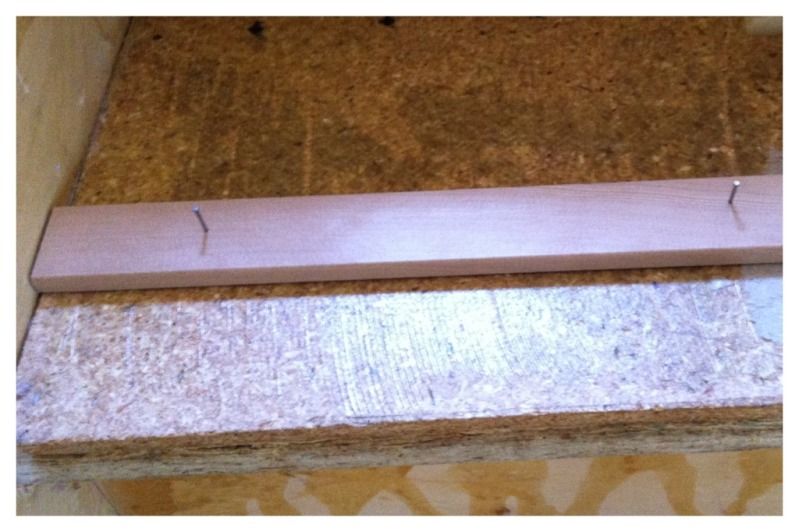
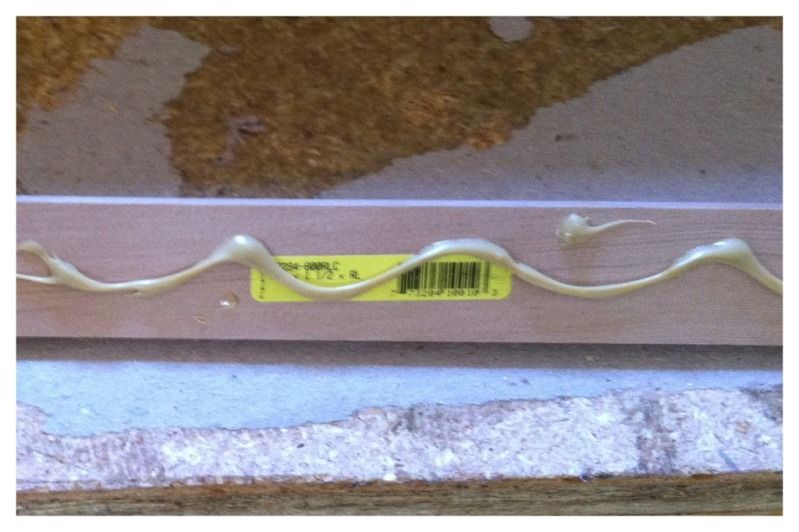
So first things first- we used the hemlock trim to rectify the gross edges of the nosings. We'd determined prior to visiting Home Depot that we needed 1.5" wide trim, so all we needed to do was cut it to length,  pre-nail some finishing nails, apply some construction adhesive to the back, and nail it into place. Which gave us this:

As you can clearly see- the top tread in that picture has yet to receive it's new face, and the bottom one had the trim applied. It made such a difference in the look of the stairs already, covering those nasty edges. Having now finished the stairs I can confidently say that I am extremely glad we didn't skip this step! Our stairs have such a nice clean profile to them because of that trim- the whole look would be ruined without it.

Next it was on to applying the paper. This wasn't difficult, although hindsight is 20/20 and having done it once if I were to do it again I'd take a lot more care in applying the paper. Just make sure there's no holes, it's well adhered to the tread, and it's as smooth as you can get it.  We followed the basic instructions given by Rachael of Lovely Crafty Home. All this step required was to rip the dry sheathing into chunks the night before (really helpful on stairs where you don't want to be hauling a big bolt of paper up and down), and to mix a 3 to 1 solution of water to white glue in the big bucket.

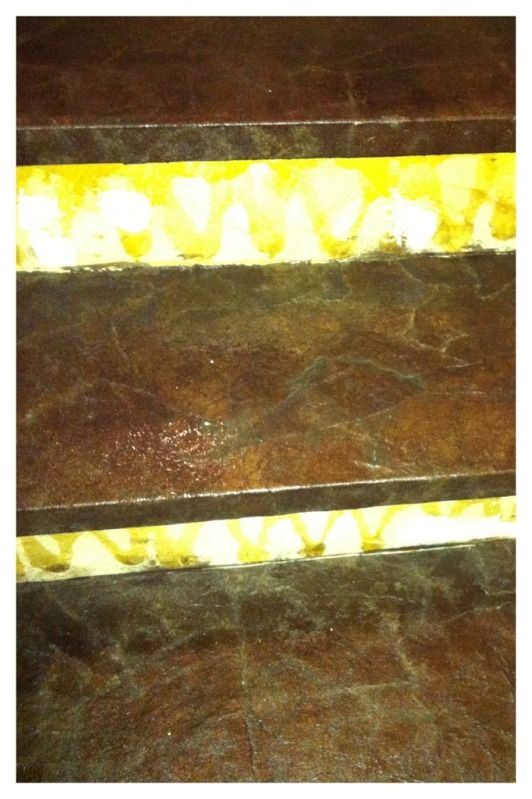
I apologize, I don't have any actions shots of this happening- glue filled hands and cameras don't mix. But there is no technique to this- just a method. Working down the staircase, and ever other tread (again so you can get up/down the stairs while it dries, and it's a lot easier to wrap the nosings if you can see under them) grab a chunk of balled up paper, dunk it in the glue mix, squeeze it out, and then smooth it on to tread. Use your dollar store paint brush to add more glue mixture and help you smooth. Try and get straight edged pieces from the edges of the roll along the back of your riser and the sides of your stringers, and marry them as closely as possible. If you're lucky and do this very carefully you can probably avoid the issue we had with a gap- but I'll discuss how we dealt with that later. Wrap large pieces around from the top of your tread to the underside of the nosing, and make sure it's well stuck. It doesn't matter how pretty the underside of your nosing is- nobody ever sees them. And once you've let them dry for a good 12 hours you're left with this:

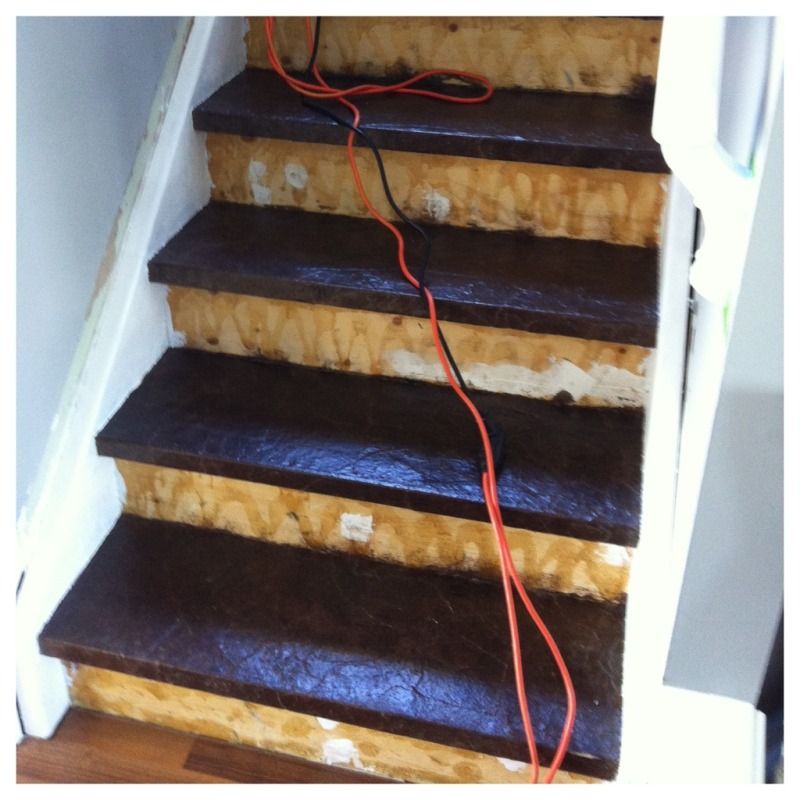
Ah. I can't tell you the relief I felt when the paper was down and looked good!! So happy!! At this point we took a break from the stairs to paint the walls. The paper held up incredibly well to this, but we did end up tearing it in a few places. We went wrong in our attempt to fix these spots- what we should have done (again with the 20/20 hindsight!) was stain stairs first, including the areas where the paper was curling up, and THEN glued them back down. However we didn't- we tried to glue them down first with straight glue. Which resulted in the stain not adhering to the patches.

Applying the stain was easy- we used one of the dollar store brushes we'd used for the glueing to swirl the stain on. Remember- this isn't wood. There's no grain. So a circular motion seemed to give us the best coverage and colour distribution. The Lovely Crafty Home guide states that the stain never really absorbs into the paper, however I think we used a different paper than she did- our stain dried. We ended up putting two coats on our paper to get the depth of colour we wanted. Once dry we  decided to camouflage the areas that weren't accepting stain by stippling on some Raw Umber Folkart acrylic paint (procured from Michaels). At first I was really worried- it seemed incredibly obvious to me. However once it'd dried it was already blending together well, and the poly removed the only thing you could notice: the different sheen.

Poly was the final step for the treads! So simple a child could do it- simply stir up the poly, and paint a thin coat on the treads and around the nosings. Once again working every second stair if you need to get up or down them, however the MinWax Oil-Modified Waterbased Poly we used has a drying time of 2 hours- and they really are completely dry once that's up. So if you can lock yourself out of your upper floor for two hours, save the time and poly every stair! We did 3 coats before starting in on painting the stringers, risers, and installing the baseboards- but I'm slowly working up to putting 12 coats of poly on in total. At the time of writing this, I'm halfway there at 6.

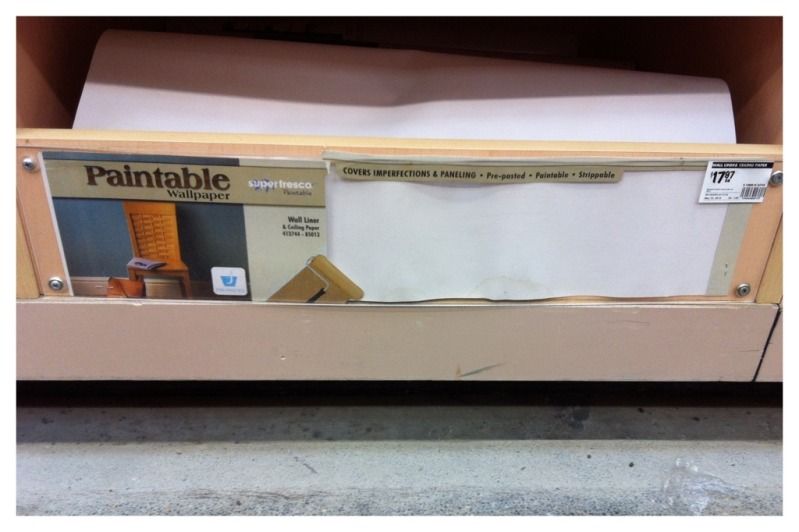
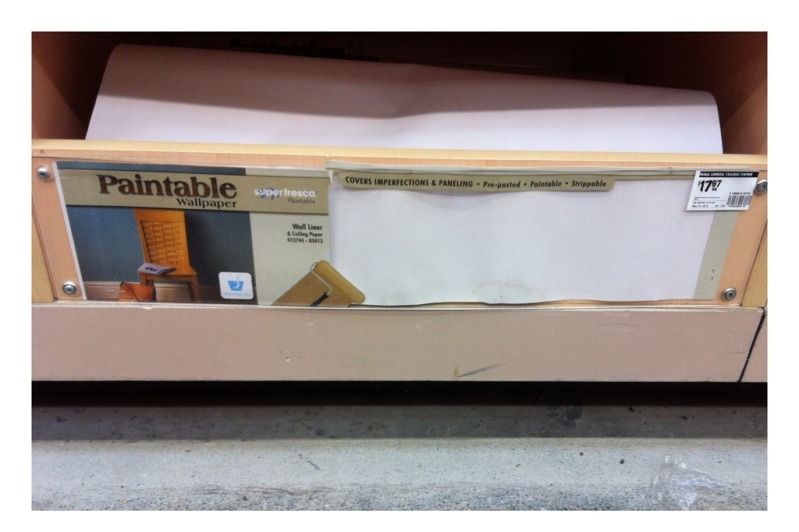
The stringers were filled and primed (due to a few big knots) before being painted. The risers had glue left over from the lino that refused to be moved (apparently a different kind than was used on the treads.) It was bumpy and uneven, so we spackled the risers leading from the main floor, but left the rest as it was a big time suck and those are the only risers anyone's going to stand staring at. Then we covered them all in this stuff:

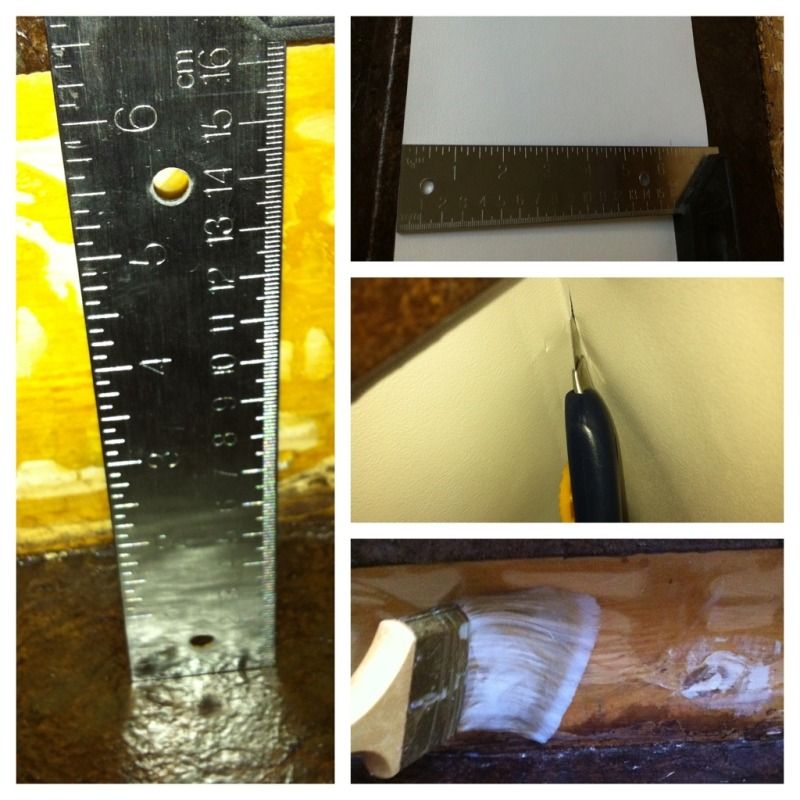
Paintable flat wallpaper! At just under eighteen dollars a roll it was by far the cheapest option, with the easiest instal. I simply measured the height of the riser, cut an overly long length of paper, measured the height on to it, cut it out, dry fit it, and then used wallpaper adhesive to glue it in tight. The excess length I trimmed using an xacto knife.

 Once that had dried I was still left with a bit of a gap between the paper and the stringers (one can only get so precise when freehanding with an xacto knife!) so I turned to my old buddy paintable caulk and filled the gap before painting the paper and the stringers in Kilz Pro-X untinted semi-gloss.

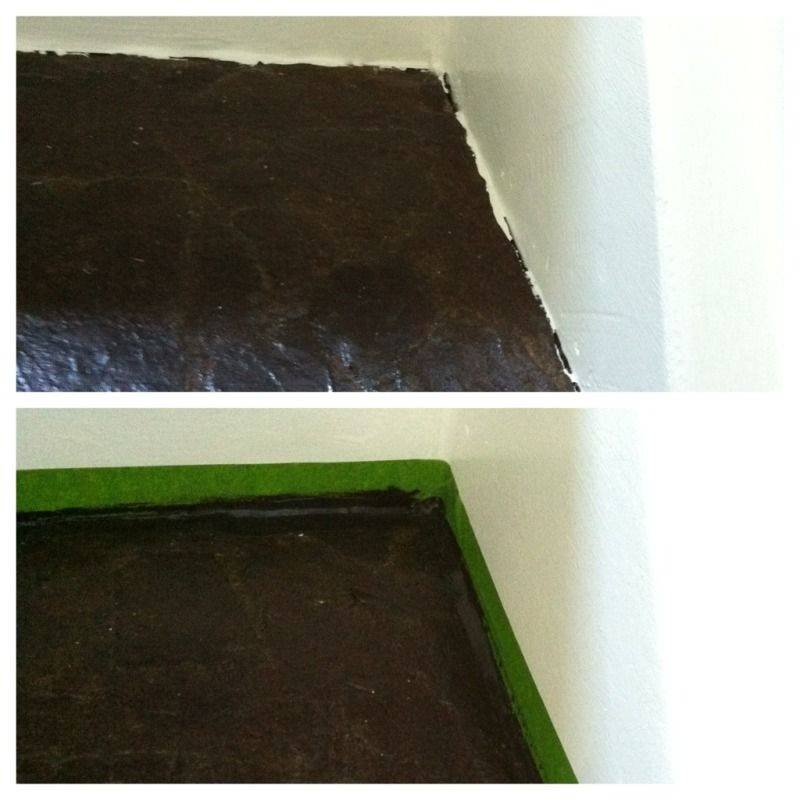
On the left you can see the gap left between the primed stringer and the wallpaper, and on the right you can see how nicely the paintable caulk hides my mess! So once all the extraneous elements were painted out in matching white, all that was left was the afore-mentioned gap between the papered treads and the stringers and risers. Remember how I said I wish we'd taken a bit more care when putting down the paper? This is why.

See the top? We couldn't get a clean edge while painting because we weren't careful about putting straight edge pieces tight against the stringers and risers. We fixed it by taping off the painted areas and using exterior brown caulking to fill it in. CAREFUL! Exterior caulk is not water-based, nor is it water clean up. I ended up having to run to Home Depot to get some special cleaner to get this stuff off my Mom's hands. It also helped to tap the still-damp caulk into place when it pulled away with the tap a tad. Again- I was really worried about how obvious it seemed until I waited for it to be dry and lightly sanded each tread with ultra fine grit sandpaper and then applied another coat of poly. It's amazing how everything blends together when it has the same sheen to it!

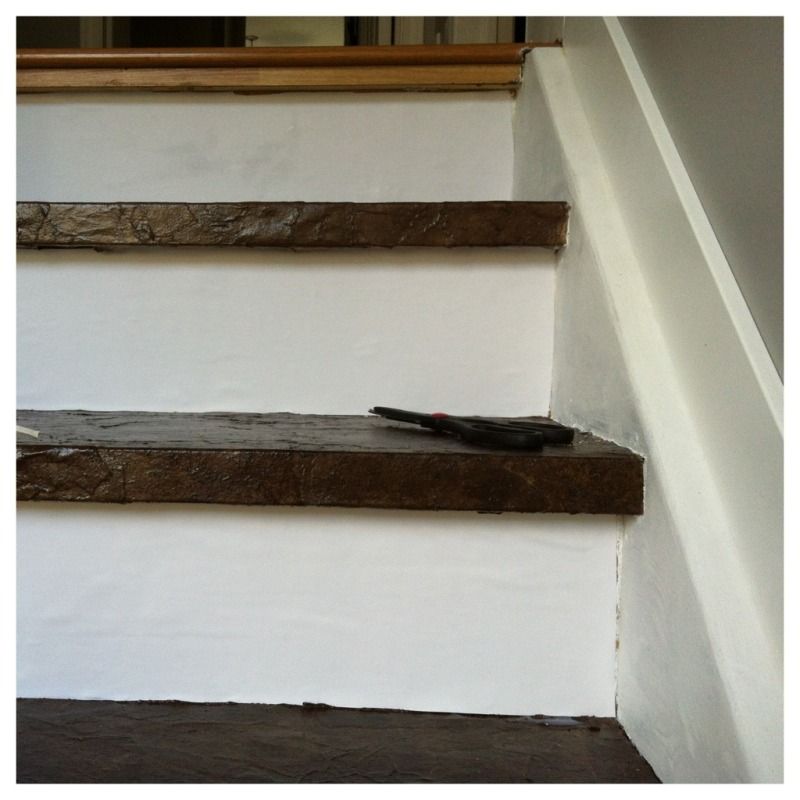
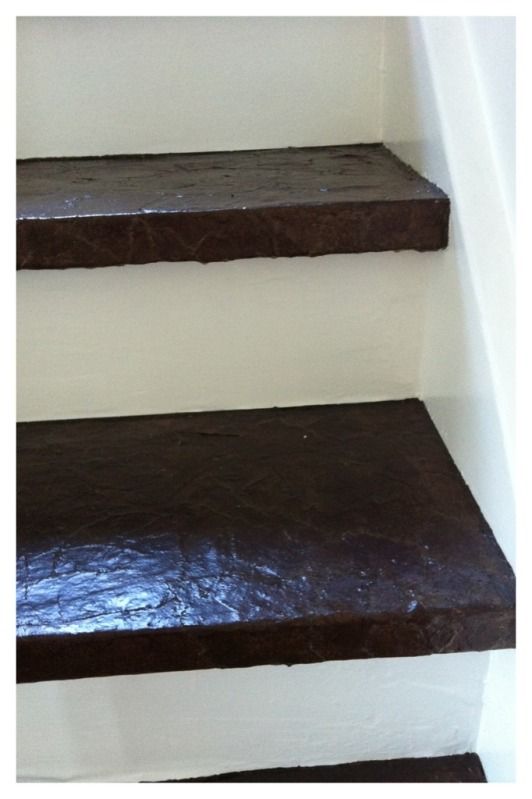
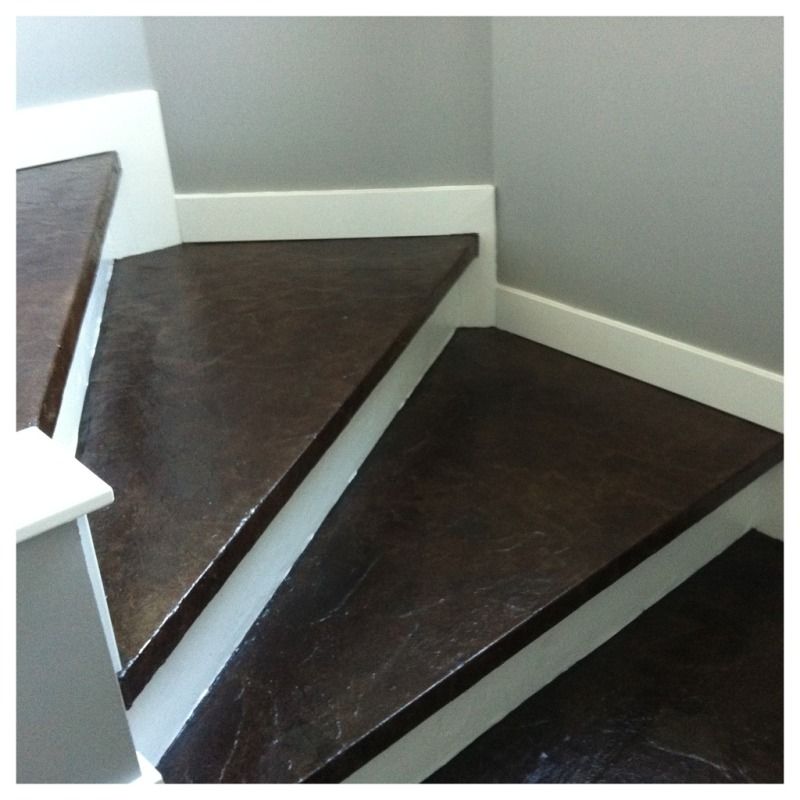
I was finally done! Here's a few pictures of the finished product:

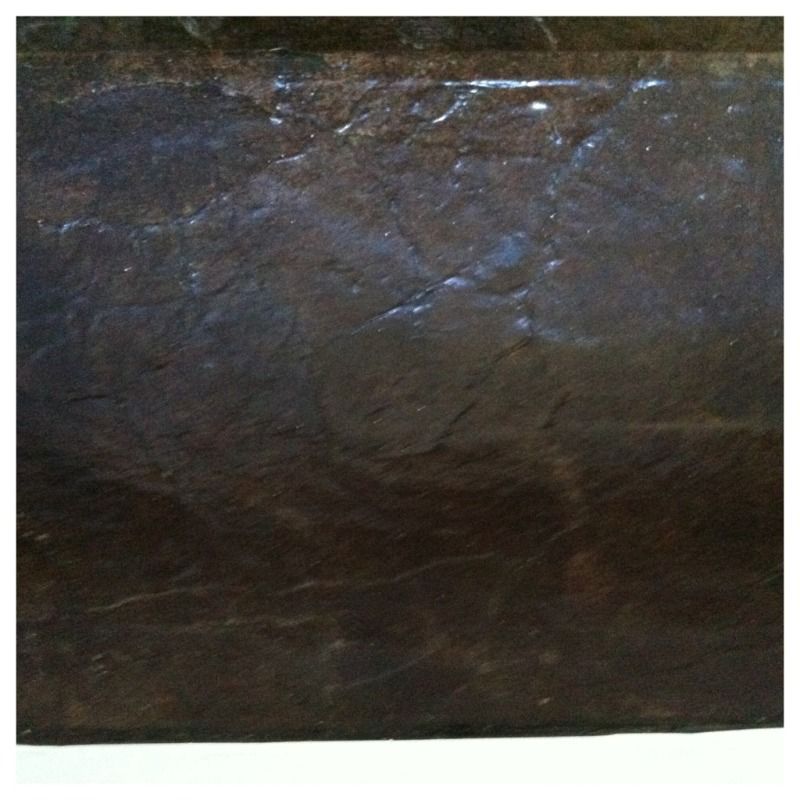
That last photo shows you a close up of the finished tread treatment- including areas with the raw umber paint patch and brown caulk. Can't tell can you?! And just as a reminder where we started:


Pretty big improvement- don't you think?! Everyone whose walked into the house since the update has been floored (pun completely intended!) by the transformation. And for a little over 200$  and a can of paint? Not half bad if I do say so myself!

I hope I've inspired you to try a creative solution to something in your house that's bugging you. And if anyone has any questions about the process or wants more information- please don't hesitate to ask in the comments! I'm more than willing to help!

8.07.2012

Stair Reveal!!

They're DONE!!!

We finally did it! We got them done!! Just three hours before I had to drop my Mommy off at the airport for her to fly home :( I'm going to miss her so much- there's no way I could have ever done this without her and it was so great to have her here to troubleshoot and share the workload and even just chat with while we worked. I felt really badly that we were working until the 11th hour, but I treated her to a gel manicure afterwards so hopefully she'll forgive me.

So last time I told you about the stairs we'd just papered them. And then we took a break from them to paint and do baseboards. Well- I say "we" lightly. I was a support trade- my Mom did almost all the painting, and she did the bulk of the baseboard cuts since my proficiency with a mitre saw was nil. I ran around getting pencils and remembering numbers and doing what I could to try and help it go smoothly.

So once all that was done we finally got around to staining the stairs. First we tried to fix some spots that got a bit ripped up while we did the walls.

The stairs with patches on them. 
Hard learned lesson: straight glue does not absorb stain. We tried to glue some patches down with straight white glue- which worked- but then when we stained the patches were painfully obvious, because the stain wouldn't absorb. I'll admit it: there's no pictures because I was freaking out- it's not something I wanted commemorated. But once again my Mom came to the rescue: she suggested that if we stippled on some acrylic paint in a similar colour nobody would be the wiser. So we stopped at Michaels and picked up some Folkart paint in Raw Umber and stippled it on. You really can't tell. Crisis averted.

Stained stairs with paint used to blend in some of the patches. Can you tell where?


The stain was applied using one of the dollar store brushes we used to apply the glue and paper in the first place. Once it was on and looking even we went ahead and applied 3 coats of poly. We used the MinWax Oil-Modified Waterbased Poly- and it's working really well. It doesn't smell bad and it's super easy to clean up.


Once that was done my Mom primed the stringers on the stairs. We opted to prime them first because they were full of uneven bits and knots- and even with them sanded down to bare wood and the holes filled we were worried they'd bleed through. So she primed while I painted trim in the livingroom.

Then it was on with the baseboards and the risers!! Mom attached baseboard while I cut and attached paintable wallpaper to plywood risers.

While looking for riser options we considered getting panelling and cutting it to size- but it was expensive!! 30$ for one sheet that would only get us four risers. And we'd need a saw to cut it. Then I remembered seeing a post on Pinterest about how someone had used textured paintable wallpaper to cover up their risers. I loved the idea, but Hubs is what some would call stringent in his desire for no "frillies". And something told me that no matter how much I liked the look of it, if I put herringbone or damask on the risers he'd have my head. But! I found this:

It's flat wallpaper that is meant to go over paneling! How great is that?! But I discovered that installing wallpaper on risers is not the same as installing it on the wall. Even though the paper is pre-glued, it was impossible to use it that way because the paper because very floppy and impossible to work with at the angle I was trying to work at. So I instead opted to use wallpaper paste in a bucket.

My basic method was measure; measure; cut; dryfit and trim; paste in place. First I measured the height of the riser and subtracted an eighth of an inch to give myself some wiggle room. I'm going to say it one more time: nobody stares under your stair nosings! (That said- if I know you in real life and I find you with your head under my stair nosings we will have words!) I then measured a line on the paper and marked it with a pencil lightly. I cut that out with scissors- I was able to get three risers per wallpaper width. I then popped the length in and dry fit it in place. This gave me a bit of overhang on each end, which I pushed into the corner with my putty knife and then trimmed it with an xacto knife. Once I was happy with the fit I just pulled out half the paper, pasted behind it, fit it back in place, and then did the other side. In!

Except that no matter how nicely I trimmed the paper, there was still a gap at either end.

No matter. That's what paintable caulk was invented for. A little in the corners and we were good to go!

Finally- we could paint it all! Two coats of Kilz Pro-X untinted semi-glass paint later we were ALMOST done!! (I know- these things don't seem like they'll ever die, do they?) The truth of the matter is that 99% of our efforts on these stairs were because we did NOT have paint-grade anything on the stairs. So we spent untold amounts of time just getting up to the point where we could paint!


Last step: caulk. There was a gap between the stringers and the paper treatment- and no matter what we did we couldn't close it. When the paper dries, it shrinks. So we decided the best solution would be caulk. They sell brown caulk for windows and doors at Home Depot- so we got a tube of that.

Much better. And once the additional coats of poly are on and the sheen is the same- you can't even tell. After I dropped my Mommy off at the airport (and cried all the way home! I may be 24- but I still need my Mommy!!) I came home and pulled all the tape off, sanded down all the stairs very lightly, and put on another coat of poly.

Ready? You're going to lay an egg when you see the difference.

Can you believe they're even the same stairs?!

Isn't the difference incredible?! I have blog worthy stairs!! No more lino and carpet!! I can't believe we got it done- but we did! And they look fantastic if I do say so myself. What do you think?! A big thank you again to my Mommy- I couldn't have done it without her and I'd have torn my hair out even attempting it. I'm going to miss her so so much! Christmas can't come fast enough.

7.26.2012

Updating the Stairs- Continued.

We papered the stairs!! Unfortunately I don't have a ton of photos of the process for you, as cameras plus glue filled hands don't really go together. But I do have befores and afters. So if you remember- the last time I posted we'd gotten as far as nailing and glueing trim along the front of the existing treads to give us a smooth, finished nosing. That was a lot of work- but I'm going to tell you now- if your nosings look anything like mine did- DO NOT skip that step! It's so important for the finished look. There were some gaps between the old edge and the new trim (a few were really gauged) but we didn't bother filling that in with wood filler.
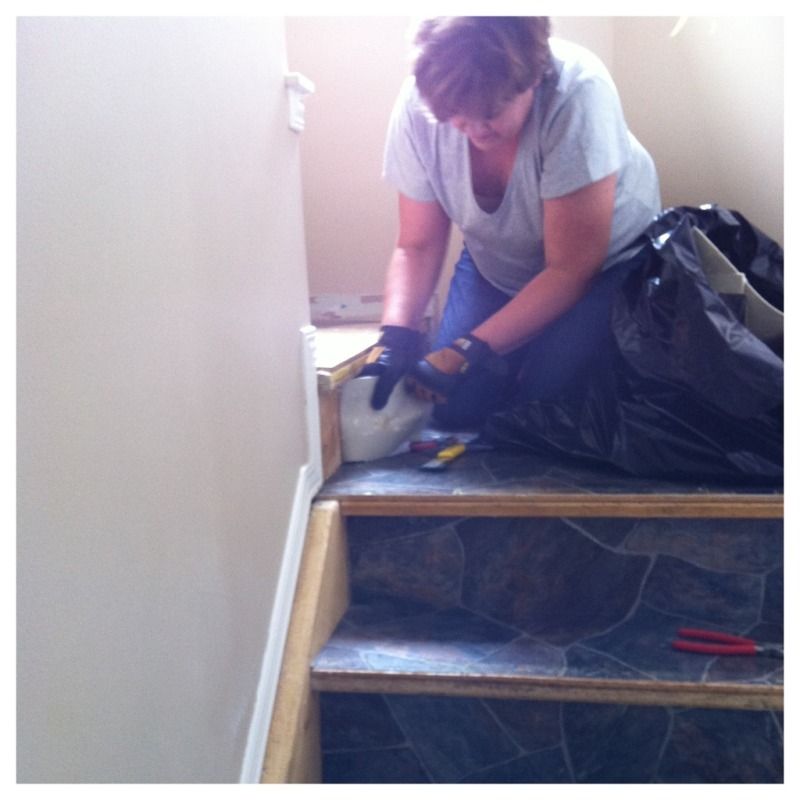
The next step was to actually get down to papering!! We started with the stairs looking like this:

No lino, new trim on the edges. The perfect canvas. Had there been holes in the treads (like if we'd pulled up carpet) we'd have filled those in with wood filler and sanded- but the lino left us with a pretty pristine surface.

Here's where we don't have any pictures. The basic method I followed was one I found via Pinterest on  Lovely Crafty Home- the Ultimate Brown Paper Flooring Guide.  This was the post that really got me thinking about doing paper floors on the stairs, and with her step by step commentary- I really felt like it was something I could handle.

Rachael suggested a 3 to 1 mix of water and white glue- so that's exactly what we used. She used brown craft paper, and we're using dry sheathing (both cheaper than any brown craft paper I could find, and I like the more woody look of it- it's a much more fibrous paper) but it worked just as well. I wouldn't mess with that. We did 6 cups of water and 2 cups of glue at a time.

There really isn't any technique to this- but there is a method. First- my Mom and I found it much easier to tear up the sheathing into bits before we started. Once you're in the thick of it your hands are full of glue and tearing paper would just make a huge mess. It also comes on a massive roll and there was no way I was going to get that up and down the stairs easily. So we spent one evening tearing and crumpling and tossing it into a recycling bag.

Second- When doing stairs, do every second tread- then let it dry. The dry sheathing falls apart a bit when it's wet, and we had just enough time to dunk it, squeeze it, put it place and smooth it down before it disintegrated. If we'd tried to walk on it while wet we'd have destroyed it. So in the interest of being able to sleep in our own beds, we did every second tread, and then the next day once the first set were dry we did the others. Once dry you can walk on them until you're ready to stain and poly.

And that's about it. Use your cheap paintbrush from the dollar store to paint on some glue mixture to the tread first. Then you take a piece out of your pre-torn bag, check to see if it has a straight edge (best for along the stringers, and along the riser edge) and then dunk it into the glue/water mix in the bucket, squeeze it out, and place it on the stair tread.

Me, up to my elbows in white glue mix, papering the stairs.

Repeat, overlapping the edges a bit and smoothing them together (the fibrous nature of the sheathing really allowed the pieces to be smoothed well) as you go. The paintbrush is also useful for this. Wrap pieces around from the top of the tread to the underside of the nosing- smoothing well. Don't worry about what the underside of the nosing looks like- you don't need straight pieces and you don't need to cover it all the way to the riser below. Nobody looks at the underside of your stair nosings. Trust me.

Continue this process, starting with the top tread and working your way down the stairwell. We tried it both ways- up and down, and the down worked a lot better. It's really hard to do the nosing from above.

So after that we were left with this:

 Once again, notice the hopping spots on the treads we'd skipped. Doesn't that look so much better?! Since we had no finished nose to our stairs, and we put the straight squared trim on to finish it- we really got a very modern, clean looking tread out of it. And the next day when we'd done the last half:

Doesn't that look incredible!? I can't believe how well it turned out. That's DRY SHEATHING on my stairs!

One more look?

It's crazy how much better they look already!! And yes- you're very perceptive- you've noticed that the colour on the walls has changed somewhere between those two photos. We decided after the paper was dry that we should paint the stairwell and living room before we started in on staining and polying because as Rachael of Lovely Crafty Home says- the stain never fully dries, and the poly takes a while to cure. We have a big double height stairwell and didn't want to put the pressure of the ladder on freshly poly'd stairs for fear of ruining it- so we decided to paint first, and if we got some paint on them or tore a bit up with the ladder that we could just rip off some more sheathing (because honestly- I still have enough on that roll to do another full staircase and probably one for my neighbours on either side too.) In the end the ladder really didn't damage them at all, and there are only a few spots where the drop cloth didn't catch the drips that we need to go over. But I'll post about the paint change in depth later.

So before we stain and poly we still need to put down the new base boards (as I'm sure you noticed in the before pictures- the previous owners couldn't cut a base board to save their lives- and it wasn't baseboard- it was window casing!) Then once we've got that under control we can go ahead and stain and poly. And I'll post about that when it happens too. The last step will be to cover the risers. We've figured out an easy and relatively cheap way to fix those, so I'll be sure to post about that process as well!

So my next posts will be about painting (and the lessons I learned from my Mom- the paint wizard extraordinaire) and baseboard installation. But the finished stairs aren't far away- hopefully!

7.22.2012

Stair Redo Day 2

So, continuing on my story about the stairs.

Sunday- Day 2- we got to start the real fun. ACTUALLY transforming the stairs. We still had some prep work to do though. First, we ripped up any of the lino that was left, and just put down some extra sheathing so we could get up and down. The lino left a lot of really tacky glue on the treads- so going up them was like being stuck to human fly paper. Not fun. You'll notice our "hopping spots" in several photos.

The issue with our stairs was that they weren't meant to not be carpeted. They were cheap, builder grade, structural stairs. If you know anything about the speed with which houses were built in Edmonton during the last boom, you'll understand- these houses were built to house bodies. They are the furthest thing from custom known to man. My aim is to change this builder grade house into something really special. But more on that later.

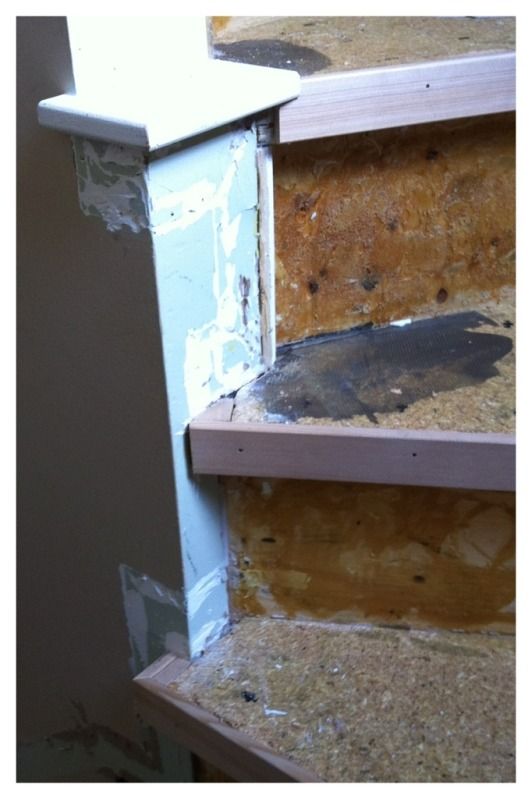
So- structural stairs. Made of plywood and particle board. The treads were smooth and level because whomever installed the lino put new fiber board on top of the existing particle board treads in order to level them. But the edges were...well...take a look:

Can't see? Look at the worst of the bunch:

That's the first of the winding treads. See how uneven and generally gross they are? My original idea was to fill them with wood filler and sand them smooth. But since they were in SUCH bad shape, my Mom came up with a better idea while we were in Home Depot: trim. So we measured the width of the tread and discovered they were all approximately 1.5 inches wide. Some were a hair under, but that was okay. When was the last time you laid down and looked UNDER the nosing of your stairs? Yeah, thought so.

So we measured how long each tread was and bought 41 feet of Hemlock door and window casing that was 1.5 inches wide. It was perfect- straight, smooth, and the right width. Sunday we measured each tread again and cut a piece of moulding to fit. Each piece was then pre-nailed with finishing nails, and we applied PL400 construction adhesive on the back. Then we fit them in place, and finished nailing the nails through. It was SUCH an improvement already!! Look!

Pre-nailed every few inches. Nothing precise. If it looked like we needed more, we added more.

Glue in a wave pattern. A la Mike Holmes.
TA DA!! Bottom stair with new nosing, top stair with ugly old nosing.
Doesn't that look worlds better already!? It made the stairs look smooth and clean- perfect. And that one I showed you earlier with the torn up corner?

Mitered, and the sunken part where the new fiber board wasn't cut to fit filled in with a scrap. So. Much. Better.

That's a view of all the winding treads meeting in the middle.

So now all the stairs are properly nosed. They don't look like a dog chewed on them anymore. Which is important, if we're going to go to all this trouble of papering them and staining them and polying them, they'd sure as heck better look smooth and professional when they're done. A few hours of prep, but so worth the 60$ in trim and the time. Taking a page out of Mike Holmes' book: Do It RIGHT the first time!

Next post will be about the actual papering process. With the nosings done, and the mess all cleaned up (yeah- try and keep your work area clean, it really helps!) we were ready to paper!!

And so it begins...

So we've started the stairs!! When Mom got here on Thursday she agreed we needed to start first thing Friday- so we did. Well- we tried. We got sidetracked and went for a manicure first. For the record- Shellac manicures last through DIY work extremely well.

SATURDAY we got going. We head to Home Depot with a list and a mission: get all the supplies for the stairs, and to paint the main area of the house. We succeeded.

But this post is about the stairs.

We went all over Home Depot gathering our loot. And this is what we ended up with. All the supplies (not including tools) cost approximately 195$.


Dry Sheathing for the actual treatment (found in the roofing aisle.)
A big gallon bucket
A caulking gun
PL400 glue in a caulk tube
MinWax Oil-Modified Water Based Poly
Smooth Finishing Nails
MinWax wood stain in Special Walnut (quart size)
3 Litres of Lepage White Glue (any brand will do.)
Hemlock Door & Window casing moulding- 1 1/2 inch wide
2 Dollar Store 3 inch paint brushes (these were actually purchased at Dollarama.)

Then we came home and started tearing the stairs apart. We already knew the rubber nosings were going to come off easily, and I'd already ripped off all the carpet on the stringers. So next step was to try the lino. This was the moment of truth- but as you already know, it came up easily!

That black stuff is leveling compound the contractor who put the lino in must have used to make sure the stairs were flat. They'd also put down new press board on each tread- which was great- it gave us a flat, level, smooth surface to work on. Perfect. So once one tread was off, we went to town.


That's my Mom ripping lino up. Word of caution: when doing anything that requires force- wear safety glasses!! We almost took a few eyes out. Seriously, they're worth it. Wear em.

After an hour or so the stairs looked like this:

Notice we left every second tread lino'd. That was just for connivence sake- we needed to be able to get up and down. Also notice we'd taken all the trim off. Do this before you pull up your carpet/lino/whatever- it makes a huge mess otherwise.

After that we were tired and called it in for the evening- we were tired!! Today was when the real fun started...